The Getting Started Guide introduces several guiding principles from the Rails philosophy:
- DRY – “Don’t Repeat Yourself” – suggests that writing the same code over and over again is a bad thing.
- Convention Over Configuration – means that Rails makes assumptions about what you want to do and how you’re going to do it, rather than letting you tweak every little thing through endless configuration files.
- REST is the best pattern for web applications – organizing your application around resources and standard HTTP verbs is the fastest way to go.
Aside from that very nice guide, there seem to be few tutorials for the newbie that are in Rails 2. I really like the approach I see in Four Days on Rails, so I’ve decided to see if I can replicate that tutorials in the latest version of Rails. I got through the first day in 3.5 hours and then spent another couple of hours reading up on what I had learned. Since it is hard for me to find contiguous stretches of time and other newbies may benefit from my experience, I’ve decided to document the process.
Sources:
- Four Days on Rails
- Akita on Rails: the First Full Tutorial
- Sean Lynch at Fairleads: Rails 2.0 step by step
My intent is not to plagiarize, but rather to give back to a most excellent community — the tutorial content is directly from Rails4Days. I quote Fabio Akita and Sean Lynch regularly and will give credit as I go.
In today’s tutorial, we will:
- Set up the environment
- Create the application
- Create the database
- Generate Scaffold
- Review what we learned (or how to do it next time in 5 mins)
code {background-color:silver}
h1 {font-size: 150%}
h1 {font-style: bold}
img
{
border:2px solid silver;
margin:0px 0px 15px 20px;
}
<a name="setup"
Set up the environment
I’ve already got Apache installed on my Mac (see nice O’Reilly article). I didn’t actually use apache on the first day, but it just seems like a good idea to be working in my webroot and it was fun to actually find the webserver pre-installed on my new Mac.
For convenience, I defined webroot in my .bashrc:
webroot=/Library/WebServer/Documents
The first thing you have to do is update your gems:
sudo gem install rails --include-dependencies
You may probably need to update RubyGems as well:
sudo gem update --system
There’s a little trick to working with MySql (via wonko ) First, download and install MySQL for Mac OS X 10.5 (x86). Don’t install the x86_64 build or Ruby will refuse to speak to it. If you’ve already installed the x86_64 build, backup your databases,
install the x86 build on top of it, and restore your databases.
Once you’ve got the correct build of MySQL installed, pop open a terminal and run the following to install the MySQL/Ruby gem:
sudo env ARCHFLAGS="-arch i386" gem install mysql --

--with-mysql-dir=/usr/local/mysql --with-mysql-lib=/usr/local/mysql/lib

--with-mysql-include=/usr/local/mysql/include
Now that the setup is compete, onward to creating the app…
Create the application
cd $webroot
rails -d mysql todo
This creates an overwhelming number of files. You’ll soon see that Rails does this a lot, but the trick is to understand what’s going on as you use the shortcuts. The tutorial dives into these directories one by one, but for those of you who like an overview, the Getting Started Guide has a nice overview of the directory structure. If you are more of a bottoms-up learner, just skip the table and read on.
| File/Folder | Purpose |
|---|---|
| README | This is a brief instruction manual for your application. Use it to tell others what your application does, how to set it up, and so on. |
| Rakefile | This file contains batch jobs that can be run from the terminal. |
| app/ | Contains the controllers, models, and views for your application. You’ll focus on this folder for the remainder of this guide. |
|
config/ |
Configure your application’s runtime rules, routes, database, and more. |
| db/ | Shows your current database schema, as well as the database migrations. You’ll learn about migrations shortly. |
| doc/ | In-depth documentation for your application. |
| lib/ |
Extended modules for your application (not covered in this guide). |
| log/ | Application log files. |
| public/ | The only folder seen to the world as-is. This is where your images, javascript, stylesheets (CSS), and other static files go. |
| script/ | Scripts provided by Rails to do recurring tasks, such as benchmarking, plugin installation, and starting the console or the web server. |
| test/ | Unit tests, fixtures, and other test apparatus. These are covered in <a href="../testing_rails_applications.html“>Testing Rails Applications |
| tmp/ | Temporary files |
| vendor/ | A place for third-party code. In a typical Rails application, this includes Ruby Gems, the Rails source code (if you install it into your project) and plugins containing additional prepackaged functionality. |
Create Your Database
Next we’ll create a database. If you look at config/database.yml, you’ll see that separate environments of dev, test, and production may be defined. Because you specified -d mysql when creating the todo app the database settings are all of MySql. Neat, huh?
development:
adapter: mysql
encoding: utf8
database: todo_development
pool: 5
username: root
password:
host: localhost

# Warning: The database defined as "test" will be erased and
# re-generated from your development database when you run "rake".
# Do not set this db to the same as development or production.
test:
adapter: mysql
encoding: utf8
database: todo_test
pool: 5
username: root
password:
host: localhost

production:
adapter: mysql
encoding: utf8
database: todo_production
pool: 5
username: root
password:
host: localhost
Notice the repeated text? Rails spells it all out for you to make it easy to modify for three separate environments. If you’ve got them all in one place, you can follow the DRY principle with this handy Rails shortcut.
defaults: &defaults
adapter: mysql
encoding: utf8
username: root
password:

development:
database: todo_development
<<: *defaults

test:
database: todo_test
<<: *defaults

production:
database: todo_production
<<: *defaults
we can set a bunch of defaults at the top, then specify what is different about our dev, test and production environments.
Akita notes: Notice that now you have a ‘encoding’ options that’s set to UTF8 by default. The Rails app itself loads up with KCODE
= true by default as well, meaning that it silently starts with Unicode support already, which is great. But that ‘encoding’ configuration has
a new usage as well: everytime Rails connects to the database it will tell it to use this ‘encoding’ setting. Like issuing a ‘SET NAMES UTF8’.
Rails 2 has far better database support. In the older versions, we’d have to actually type SQL commands and manually create the database. The procrastinating programmer who is only now learning Rails scores!
To create the database, simply type:
rake db:create:all
Note: MySql has to be started for it to work. If you get errors, make sure you set your db name and password correctly in config/database.yml (I made that mistake and got a weird error that said:
Couldn't create database for {"encoding"=>"utf8", "username"=>"root",
"adapter"=>"mysql", "host"=>"localhost", "password"=>nil,
"database"=>"todo_development", "pool"=>5}, charset: utf8,
collation: utf8_general_ci (if you set the charset manually, make
sure you have a matching collation)
All good? Now you can look at mysql and see your brand new databases
$ mysql -uroot
Welcome to the MySQL monitor.  Commands end with ; or g.
Your MySQL connection id is 12
Server version: 5.0.67 MySQL Community Server (GPL)

Type 'help;' or 'h' for help. Type 'c' to clear the buffer.

mysql> show databases;
+--------------------+
| Database           |
+--------------------+
| ....               |
| todo_development   |
| todo_production    |
| todo_test          |
+--------------------+
6 rows in set (0.00 sec)

mysql> exit
You can try other fun rake commands…
$ rake db:charset
(in /Library/WebServer/Documents/todo)
utf8
$ rake db:version
(in /Library/WebServer/Documents/todo)
Current version: 0
Here’s a handy table of Rake database tasks from Akita:
| db:charset | Retrieves the charset for the current environment’s database |
| db:collation | Retrieves the collation for the current environment’s database |
| db:create | Create the database defined in config/database.yml for the current RAILS_ENV |
| db:create:all | Create all the local databases defined in config/database.yml |
| db:drop | Drops the database for the current RAILS_ENV |
| db:drop:all | Drops all the local databases defined in config/database.yml |
| db:reset | Drops and recreates the database from db/schema.rb for the current environment. |
| db:rollback | Rolls the schema back to the previous version. Specify the number of steps with STEP=n |
| db:version | Retrieves the current schema version number |
Akita says… If we want to start from scratch, we can do db:drop:all. And in the middle of development we can do db:rollback to undo the latest migration file.
Ok, now you have some databases, but there is nothing in them
mysql> show tables;
Empty set (0.00 sec)
Generate Scaffold
Hold on to your hat and types these two lines into your terminal….
Note: the text you type is highlighted gray, the other text is expected output
./script/generate scaffold Category title:string
exists  app/models/
exists  app/controllers/
exists  app/helpers/
create  app/views/categories
exists  app/views/layouts/
exists  test/functional/
exists  test/unit/
exists  public/stylesheets/
create  app/views/categories/index.html.erb
create  app/views/categories/show.html.erb
create  app/views/categories/new.html.erb
create  app/views/categories/edit.html.erb
create  app/views/layouts/categories.html.erb
create  public/stylesheets/scaffold.css
create  app/controllers/categories_controller.rb
create  test/functional/categories_controller_test.rb
create  app/helpers/categories_helper.rb
route  map.resources :categories
dependency  model
exists    app/models/
exists    test/unit/
exists    test/fixtures/
create    app/models/category.rb
create    test/unit/category_test.rb
create    test/fixtures/categories.yml
create    db/migrate
create    db/migrate/20081213223324_create_categories.rb
rake db:migrate
(in /Library/WebServer/Documents/todo)
==  CreateCategories: migrating ===============================================
-- create_table(:categories)
-> 0.0032s
==  CreateCategories: migrated (0.0034s) ======================================
What just happened? Let's go back to mysql and check it out.
mysql> use todo_development;
Database changed

mysql> show tables;
+----------------------------+
| Tables_in_todo_development |
+----------------------------+
| categories                 |
| schema_migrations          |
+----------------------------+
2 rows in set (0.00 sec)

mysql> show columns from categories;
+------------+--------------+------+-----+---------+----------------+
| Field      | Type         | Null | Key | Default | Extra          |
+------------+--------------+------+-----+---------+----------------+
| id         | int(11)      | NO   | PRI | NULL    | auto_increment |
| title      | varchar(255) | YES  |     | NULL    |                |
| created_at | datetime     | YES  |     | NULL    |                |
| updated_at | datetime     | YES  |     | NULL    |                |
+------------+--------------+------+-----+---------+----------------+
4 rows in set (0.00 sec)
Now with a little help from fairleads, let's poke around what rails has generated for us..
./script/server
=> Booting Mongrel (use 'script/server webrick' to force WEBrick)
=> Rails 2.2.2 application starting on http://0.0.0.0:3000
=> Call with -d to detach
=> Ctrl-C to shutdown server
** Starting Mongrel listening at 0.0.0.0:3000
** Starting Rails with development environment...
** Rails loaded.
** Loading any Rails specific GemPlugins
** Signals ready.  TERM => stop.  USR2 => restart.  INT => stop (no restart).
** Rails signals registered.  HUP => reload (without restart).  It might not work well.
** Mongrel 1.1.4 available at 0.0.0.0:3000
** Use CTRL-C to stop.
Note: In development mode, Rails does not generally require you to stop the server; changes you make in files will be automatically picked up by the server.
point your browser at: http://localhost:3000/categories
You'll see a page generated from the rails view

You can use the links to create new catgories...
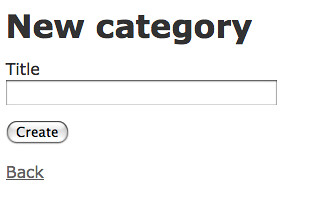
then when you go back to the categories page, you will see that is dynamically displays the list of categories

What did we learn?
- By typing 4 lines into your terminal you can create a database application with basic (CRUD) list operations:
rails -d mysql todo
rake db:create:all
./script/generate scaffold Category title:string
rake db:migrate
- You can run your application using the Rails browser
./script/server
point your browser at: http://localhost:3000/categories
- There's still a lot of magic going on, which we'll learn about on day 2
Stay tuned.
situated learning through open source
I just read Situated Learning: Legitimate Peripheral Participation by Jean Lave and Etienne Wenger, which I put on my wish list since I am a total geek about theories of how people learn, particularly with regard to social learning. It’s a challenging …